Growing 101:
How to Harvest Your Cannabis Plants – and What to Do Next

 Add MyCannabis.com to your preferred sources on Google
The content on MyCannabis.com is for educational purposes only and should not be taken as medical advice.

A successful cannabis harvest starts with a plan for what happens after cutting. Have a clean workspace, suitable drying area and secure storage ready before the plants come down. Harvest timing, gentle handling and moisture control all matter; none can be reduced to one visual cue or a fixed number of days.
1. Assess the Plant Before Cutting
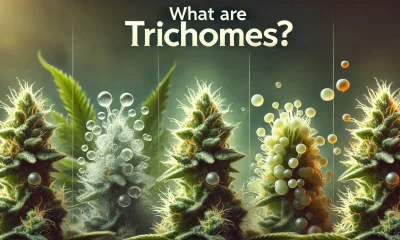
Compare flower development with the crop’s history and expected flowering period. Inspect representative flowers under magnification, rather than deciding from one leaf or bud. Our trichome assessment guide explains what clear, cloudy and amber appearances can and cannot tell you.
Yellowing leaves, drooping branches or curling tips can also reflect stress, disease or watering problems. They are not proof that a plant is ready. Likewise, a cloudy gland head is not a measurement of peak THC or a guarantee of particular effects.
Inspect for mold, pests and damaged material. Keep suspect material separate and do not mix it into an otherwise sound harvest. Where cultivation is permitted, follow the applicable rules for growing, possession and disposal; homegrown status does not remove those requirements.
2. Prepare the Equipment and Drying Space
Useful harvesting equipment includes sharp shears, smaller trimming scissors, suitable gloves, clean trays, labels and supports for hanging branches or laying out flowers. A thermometer and humidity monitor help track the drying environment.
Clean tools before starting and between plants as appropriate. Resin removal alone is not a validated pathogen-control procedure. Oregon State University Extension explains why common disinfectants are not all effective against hop latent viroid. Choose a procedure suited to the equipment and relevant plant-health risks.
Allow enough space to avoid crowding. Keep the harvest away from children, pets, household contaminants and direct sunlight. Label separate plants or batches so that observations and any later concerns remain traceable.
3. Cut Manageable Sections
Support a branch before cutting it, then place or hang it so that flowers are not crushed against each other. Some growers cut whole plants and others work branch by branch. The appropriate method depends on plant size, handling capacity and the drying space.
Do not expect a cannabis plant cut near its base to reliably produce another crop. Cannabis is generally grown as an annual. Deliberate revegetation of suitable photoperiod plants requires retained living growth and specific management; it is not an automatic result of leaving roots in the soil.
4. Choose Wet or Dry Trimming
Wet trimming removes selected foliage before drying; dry trimming does more of that work afterward. Both approaches involve tradeoffs in handling, drying rate and preservation of gland heads. Remove unwanted large leaves and damaged material without repeatedly rubbing or squeezing the flowers.
There is no need to strip every small sugar leaf to make a harvest valid. The end use and desired finish matter. Keep trimmings identified separately rather than assuming that they have the same cannabinoid concentration as the finished flower.
5. Dry Under Monitored Conditions
Hanging branches is a convenient way to support them and expose surfaces to air. It does not cause cannabinoids in the stalk to drain into the buds. Much of the resin is produced and stored in glandular structures on the flowers themselves.
OSU’s hemp post-harvest guidance describes slow drying in a dark, ventilated space at approximately 18–21°C (64–70°F) and 50–55% relative humidity. These are example environmental conditions, not a guarantee of a particular drying time or a universal protocol for every crop.
Check the material and room regularly. Flower size, loading and airflow affect drying. A 2025 industrial hemp study found differences in cannabinoid conversion and microbial levels between drying methods, underscoring that faster or hotter is not automatically better for every purpose.
6. Distinguish Room Humidity From Product Moisture
A room hygrometer measures air humidity. It does not directly measure the percentage of water inside a flower. An equilibrated reading in a closed sample container can provide additional information, but inexpensive sensors and inconsistent sampling have limits.
Water activity is another measurement, distinct from moisture content, used to assess how available water is for microbial growth. Do not interpret a reading of 62% relative humidity as flower containing 62% water, or assume that any reading below 70% establishes safety.
If flowers remain too moist, continue appropriate drying rather than sealing them away and relying on occasional lid opening. Visible mold or other evidence of spoilage is not corrected by curing.
7. Cure and Store With Ongoing Checks
Curing conditions already-dried material. Its duration varies, and evidence does not establish that every harvest needs four to six weeks or that curing takes as long as growing. Monitor the material instead of following an arbitrary calendar.
For long-term storage, use appropriate labeled containers and protect the product from unsuitable heat, light and moisture. Keep it locked away from children and pets. Storage accessories can help maintain conditions, but cannot prove potency or repair a contaminated harvest.